
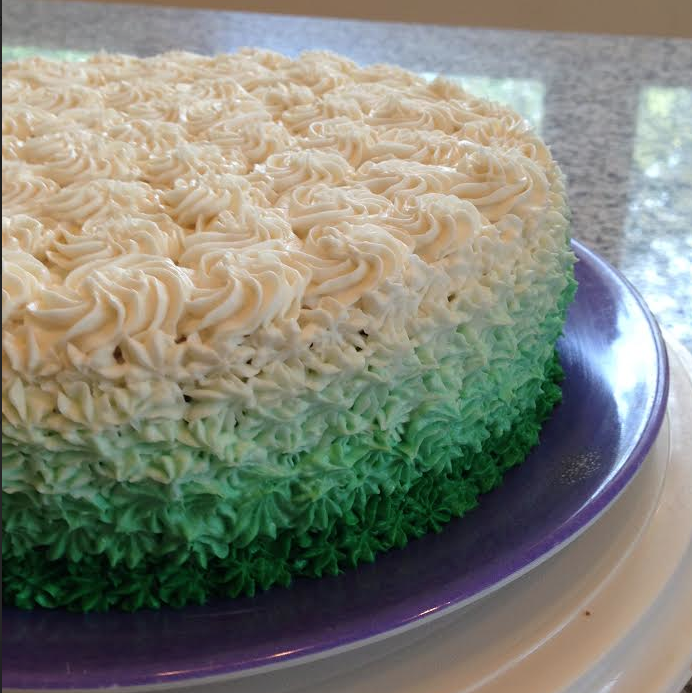
A transition of color for my daughter’s graduation from junior high and transition to high school. Yes, a little trite but she had been asking for a cake like this for a while and I always like a baking challenge.
Warning: coloring frosting is about art, not math. Having a degree in engineering, I originally took a mathematical approach to mixing my colors. I took 1 cup of white frosting and 1 cup of the dark green frosting and mixed the two colors. I thought that would end up being the middle line of frosting in the cake. WRONG. It was way too dark and I ended up using it as the second line from the bottom.
Before applying the ombre decoration on the sides of a cake, skim coat the entire cake and decorate the top.
Decorating Ombre Style
1. Make a double batch of white frosting (whatever recipe you prefer)
2. Dye 1 1/2 cups of white frosting to color desired (this will be used as your darkest shade at the bottom) Set aside in a bowl for later
3. Fill pastry bag, fitted with a decorating tip (here I used a Wilton #32) and about 1/2 cup of the darkest frosting. Using your decorating skills apply one line of frosting around the bottom edge of the cake. Squeeze any extra frosting left in your pastry bag back into your bowl of dark frosting.
4. Place the remaining white frosting in your clean mixing bowl
5. Fill a new pastry bag, fitted with a clean decorating tip and about 1/2 cup of white frosting. Using your decorating skills apply one line of frosting around the upper edge of the cake. Squeeze any extra frosting left in your pastry bag back into your mixing bowl.
6. Place about 1 Tablespoon of the darkest shade of frosting in the mixing bowl of white frosting. Mix until well combined. If the shade is not as dark as you desired, add a tad bit more of the darkest shade of frosting and mix well. When you achieve the perfect desired color. Fill the pastry bag with this new color. You can use the same bag and tip but be sure to squeeze out any leftover earlier color in the tip before applying the next line of the new color. Apply one line of frosting just below the previous line. Make sure the lines are close together so that no underlying cake shows through. Squeeze any extra frosting left in your pastry bag back into your mixing bowl.
7. Repeat step six until you have enough lines to cover the entire side of your cake. The cake above was a standard two layer cake that was leveled. I used 8 shades/lines of frosting to fill the entire side.
There are many different ways to apply the frosting to the sides of the cake. Here are some examples:
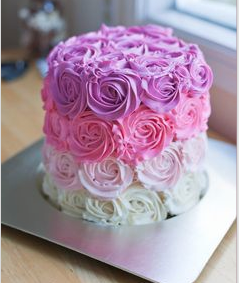
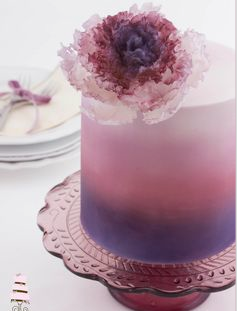


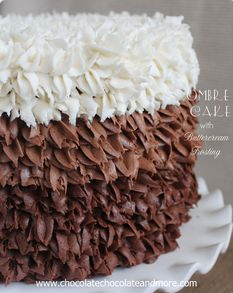
Check out: BS’ in the Kitchen; The Craftsy Blog; Modwedding; Wilton; and Chocolatechocolateandmore

It’s a lucky family who gets to eat a treat as beautiful as this! 💥💥💥💥💥🎈
LikeLike
OMG! What kind of food porn is this even?
Wow, that looks amazing and delicious! I wish I had the patience to do such things!
LikeLiked by 1 person
Thank you so much. It did take a lot of time and my hand hurts today from all those tiny little stars. 🙂
LikeLike
[…] Ombre Frosting […]
LikeLike